Samsung DVD-VR335 Instruction Manual
Browse online or download Instruction Manual for DVD players Samsung DVD-VR335. Samsung DVD-VR335 Instruction manual User Manual
- Page / 103
- Table of contents
- TROUBLESHOOTING
- BOOKMARKS
- DVD-VR335 1
- Precaution 3
- Contents 6
- General Features 8
- Before Reading the 9
- User’s Manual 9
- Getting Started 10
- Description 11
- Unpacking 12
- Connecting & 14
- Setting Up 14
- Connections 15
- S-Video Cable 26
- (not supplied) 26
- Audio/Video 26
- Step 6 : Connecting 29
- System Setup 31
- Auto Clock Set 32
- Manual Clock Set 33
- Channel Set 34
- Auto Channel Memory 34
- Channel Add/Delete 35
- RF Output Channel 35
- Setting Up the 36
- Language Options 36
- Setting Up the Audio 37
- Display(Video) Options 38
- Setting Up the Parental 39
- DivX(R) Registration 39
- VCR Setting 41
- Video Input 42
- DVD EP Mode Time 42
- Automatic Chapter 43
- Quick Recording 44
- Playback 45
- Playing a Disc 46
- Using the Disc Menu 47
- About ANYKEY 48
- Repeat Playback 49
- Selecting the Subtitle & 50
- Audio Language 50
- Changing the Camera 51
- Zooming-In 51
- Using the Bookmarks 52
- Using the Markers 53
- Playing back an Audio 54
- CD (CD-DA) 54
- Playing back an MP3 55
- Play Option Mode 56
- Repeat Playback of an 56
- Audio/MP3 Disc 56
- To Program Tracks 57
- Playing an MPEG4 Disc 58
- Playing the VCR 59
- Tracking 59
- Special VCR Playback 60
- Features 60
- S-VHS Playback 60
- Variable Search 60
- Recording 62
- Recording the Current 64
- Channel you are watching 64
- Recording through the 65
- DV Input jack 65
- Recording from 65
- External Devices 65
- Making a Timer 66
- Making a One Touch 66
- Recording (OTR) 66
- Editing the Scheduled 68
- Record List 68
- Deleting the 68
- Scheduled Record List 68
- Basic VCR Recording 69
- Check Remaining Time 70
- Copy to DVD or VCR 71
- Playing the Title List 73
- 74 - English 74
- Basic Editing (Title List) 75
- 76 - English 76
- Locking(Protecting) a Title 76
- English - 77 77
- Deleting a Title 77
- Deleting a Section of a Title 77
- 78 - English 78
- English - 79 79
- Editing a Chapter 79
- 80 - English 80
- English - 81 81
- Dividing a Title 81
- Advanced Editing 82
- (Playlist) 82
- English - 83 83
- Renaming a Playlist Title 83
- 84 - English 84
- English - 85 85
- 86 - English 86
- English - 87 87
- Disc Manager 88
- English - 89 89
- Disc Protection 89
- 90 - English 90
- Formatting a Disc 90
- Finalizing a disc 90
- English - 91 91
- 92 - English 92
- Delete All Title Lists 92
- English - 93 93
- Edit Compatible 93
- Reference 94
- Troubleshooting 95
- Troubleshooting (DVD) 96
- Troubleshooting (VCR) 97
- Problems and Solutions 98
- (Display error Message) 98
- Specifications 100
- Contact SAMSUNG WORLD WIDE 102
- N.J. 07660-0511 103
- TEL: 1-800-SAMSUNG (726-7864) 103
- AK68-00995E-00 103
Summary of Contents
Instruction ManualDVD-VR335www.samsung.comAK68-00995E-00English00995E-VR335_XAA-Eng1 2006.4.3 8:23 PM Page 1
Getting Started10 - EnglishStep 6Finalizing & Playing onother DVD componentsTo play your DVD on other DVD players, finalizingmay be necessary. Fir
100 - EnglishReferencePower requirements 120V AC, 60Hz Power consumption 28 WattsGeneral Weight 8.75 lbDimensions 16.9 in(W) x 10.6 in(D) x 3.1 in(H)
SAMSUNG DVD RECORDER & VCRLIMITED WARRANTY TO ORIGINAL PURCHASERThis SAMSUNG brand product, as supplied and distributed by Samsung Electronics Ame
Contact SAMSUNG WORLD WIDEIf you have any questions or comments relating to Samsung products, please contact the SAMSUNGcustomer care center.North Ame
SAMSUNG ELECTRONICS AMERICA, INC.105 Challenger Road, Ridgefield Park, N.J. 07660-0511TEL: 1-800-SAMSUNG (726-7864)AK68-00995E-00English00995E-VR335_X
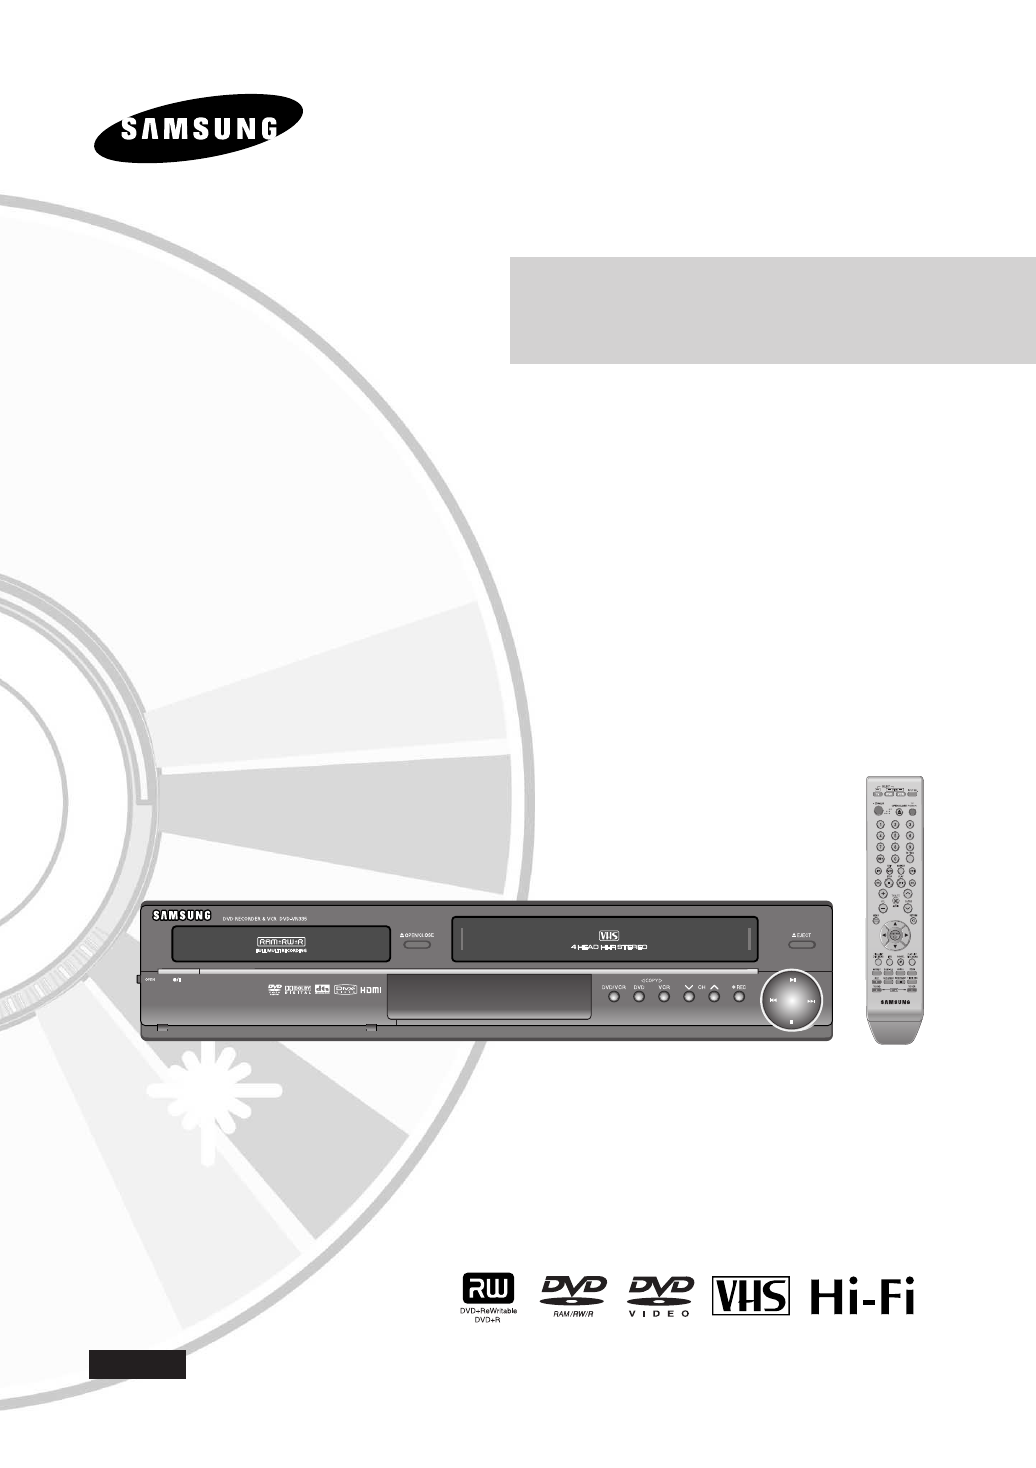
Getting StartedEnglish - 11Front Panel 1 2 3410 11 14 151. DVD DECK 2. DVD OPEN/CLOSE BUTTON3. VCR DECK 4. VCR EJECT BUTTON5. POWER BUTTON 6. VIDEO I
Getting Started12 - EnglishRear Panel 1. VIDEO INPUT JACK (AV 1 IN)2. VIDEO OUT JACK (AV OUT)3. AUDIO OUT JACKS(COMPONENT OUT) 4. S-VIDEO IN/OUT JACKS
Getting StartedEnglish - 13Tour of the Remote Control13. SUBTITLE ButtonPress this to switch the DVD’s subtitle language.14. ANYKEY ButtonPress this t
14 - EnglishConnectionsConnecting &Setting UpQuick OverviewA Quick overview presented in this guide will give youenough information to start using
English - 15ConnectionsStep 1: Connecting the Antenna CableThere are several ways to connect your DVD Recorder & VCR. Select the antenna connectio
16 - EnglishConnectionsAntenna + Cable box + DVD Recorder & VCR + TV : Cable box with many scrambled channelsYou can record channels by selecting
English - 17ConnectionsAntenna + DVD Recorder & VCR + Cable box + TV : Cable box with a few scrambled channelsYou can record non-scrambled channel
18 - EnglishConnectionsStep 2 : Connecting the Video CableThere are several ways to connect your DVD Recorder & VCR. Select one of the video conne
English - 19Connections S-Video and Component video output areavailable only if your TV supports S-Videoinput or Component video input, respectively.I
Getting Started2- EnglishWarningTO REDUCE THE RISK OF ELECTRIC SHOCK, DO NOTREMOVE THE COVER(OR BACK).NO USER-SERVICEABLE PARTS ARE INSIDE. REFERSERVI
20 - EnglishConnectionsComponent Cable(not supplied)COMPONENTPRPBYgreenblueredgreenblueredConnecting to Component video input jacks (Y,PB,PR)Connect C
English - 21ConnectionsStep 3 : Connecting the Audio CableSelect one of the Audio connections on the following pages.INPUTAUDIORLRedWhiteVIDEOYellowAu
22 - EnglishConnectionsAudio/Video CableINPUTANALOG AUDIORLRed WhiteConnecting to a stereo amplifier with analog input jacksIf your stereo amplifier
English - 23ConnectionsOptical Cable(not supplied)Coaxial Cable(not supplied)INPUTDigital AudioorAV amplifierConnecting to an AV amplifier with a di
24 - EnglishStep 4 : Connecting HDMI/DVI to a TVConnecting to a TV with HDMI JackUsing an HDMI- HDMI cable(not included) connect the HDMI OUT jack on
English - 25Connecting to a TV with DVI JackUsing an HDMI-DVI cable (not included), connect the HDMI OUT terminal on the rear of the DVD Recorder to t
26 - EnglishConnectionsStep 5 : Connecting External DevicesThis allows you to connect your DVD Recorder & VCR to other external devices and view o
English - 27ConnectionsAUDIOVIDEORLOUTPUTAudio/VideoCableCamcorderConnecting a Camcorder to the AV 2 IN jacksYou can also use the AV 2 IN jacks on
28 - EnglishConnectionsDV OUTDV Cable(not supplied)CamcorderConnecting a Camcorder to the DV IN jackIf your camcorder has a DV output jack, connect i
English - 29ConnectionsAfter all connections are complete, plug the power cordin the wall outlet.“Auto” appears in the front panel display. Thismeans
Getting StartedEnglish - 3Important Safety InstructionsRead these operating instructions carefully before usingthe unit. Follow all the safety instruc
30 - EnglishConnectionsTo determine whether your television is compatible, follow the instructions below.1. Switch your television on.2. Point the rem
English - 31System SetupSystem SetupOn-Screen MenuNavigationThe on-screen menus allow you to enable or disablevarious functions on your DVD Recorder &
32 - EnglishSystem SetupAuto Clock SetThis menu is used to set the current time. You need toset the time to use timer recording. 1With the unit in Sto
English - 33System Setup3Press the …† buttons to select Clock Set, thenpress the ENTER or √ button.4Press the …† buttons to select Manual ClockSet, th
34 - EnglishSystem SetupChannel SetThis feature allows you to manually set the DVDRecorder & VCR’s tuner band to Antenna or Cable,whichever you co
English - 35System SetupSystem SetupChannel Add/Delete4Press the …† buttons to select ChannelAdd/Delete, then press the ENTER or √ button.5Press the …
36 - EnglishSystem Setup3Press the …† buttons to select Channel Set,then press ENTER or √ button.4Press the …† buttons to select RF OutputChannel, the
English - 37System SetupSetting Up the AudioOptionsAllows you to setup the audio device and sound statussettings depending on the audio system in use.
38 - EnglishSystem SetupSetting Up theDisplay(Video) OptionsThis function allows you to setup the TV screen settings.1With the unit in Stop mode/No Di
English - 39Setting Up the ParentalControlThe Parental Control function works in conjunction withDVDs that have been assigned a rating - which helpsyo
Getting Started• Only JPEG files with the ".jpg", ".JPG" extension can beused.• The unit can handle a maximum of 1000 files and fo
40 - EnglishSystem Setup5The Re-enter Password screen appears to confirmthe password. Enter your password again, andthen press the ENTER or √ button.6
English - 41System Setup5Press the …† buttons to select the desired VCRoption, then press the ENTER or √ button.6Press the …† buttons to select the de
42 - EnglishSystem SetupVideo InputYou can watch video from an external componentthrough the AV 1(Composite) or S-video input jacks.1With the unit in
English - 43System Setup7Press the REC button to start recording.The message "Do you want to create the chaptermenu after this recording?" i
44 - EnglishSystem SetupQuick RecordingIt takes about 10 seconds for a disc to load (initialize)every time you turn on the unit. To bypass this initia
English - 45PlaybackPlaybackThis section introduces basic functions of play-back by disc type.Before PlayingRead the following information before play
46 - EnglishPlaybackPlaying a DiscThis DVD Recorder & VCR can only operate withdiscs that are compatible with DVD-RAM StandardVersion 2.0.Playba
English - 47PlaybackUsing the Search & SkipFunctionsSearching through a Chapter or TrackDuring playback, press the SEARCH œœ or √√button on the re
48 - EnglishPlaybackSlow Motion Play/Step Motion PlaySlow Motion Play (DVD-VIDEO / DVD-RAM/ DVD±RW / DVD±R)During pause mode, press the SEARCH œœ or √
English - 49Playback• If you want to move to a desired time to help you finda scene.1Press the ANYKEY button during playback.2Press the ……††buttons to
Getting StartedEnglish - 5DVD-RW Disc Playback and Recording• Recording and playback can be performed on DVD-RW discs in both Video and VR Modes.• Onc
50 - EnglishPlaybackSelecting the Subtitle &Audio LanguageSelecting the SUBTITLElanguageSubtitle languages may not work depending on the disc type
English - 51PlaybackUsing the ANGLE button1Press the ANGLE button, during playback.2Press the …† button to select the desired angle.Using the ANYKEY b
52 - EnglishPlaybackPlaying back a Bookmark1Press the MARKER button.2Press the œ √ buttons to select a bookmarkedscene.3Press the ENTER or √llbutton t
English - 53PlaybackUsing the Markers1Press the MARKER button during playback.2Press the ENTER button when the desired sceneappears.• The number 01 is
54 - EnglishPlaybackButtons on the Remote Control usedfor CD playback1. lœœbutton: Returns to the beginning of the currenttrack when pressed during pl
English - 55PlaybackPlaying back an MP3DiscPlaying an MP3 Disc1Insert an MP3 disc into the disc tray.2Press the …† buttons to select the Disc Navigati
56 - EnglishPlaybackPlay Option Mode1During Stop, Press the ANYKEY button.The Play option will be highlighted.2Press the œ √ buttons to select a desir
English - 57PlaybackYou can register a maximum 30 tracks in the playlist.1In still mode, press the ANYKEY button. The Play option will be highlighted.
58 - EnglishPlayback5-1If you press the √ll button, the Slide ShowSpeed screen will appear.Press the œ√ buttons to set the slide showspeed, then press
English - 591Insert a standard VHS tape into the VCR deck.• When a tape is inserted, power will turn on auto-matically.2Press the √II(PLAY/PAUSE) but
Getting Started6- EnglishContentsGetting StartedGetting StartedWarning . . . . . . . . . . . . . . . . . . . . . . . . . . . . . . . . . . . . . . .2P
60 - EnglishPlaybackWhile a videotape is playing, you can enjoy a variety ofspecial playback features, including Still, Frame Advance,Skip, Slow motio
English - 61Playback2Press the …† buttons to select Forward IntroScan or Reverse Intro Scan, then press theENTER button. When an Index mark is found,
62 - EnglishRecording Finalize- This closes the DVD-RW/±R so no additionalrecording can be done. Unfinalize - This allows additional recording on
English - 63RecordingRecording FormatsWhen you insert an unused disc, the following messageappears. Since available functions differ depending onthe d
64 - EnglishRecordingConcerning Copy Control SignalsTV broadcasts that contain copy control signals may haveone of the following three signal types, C
English - 65RecordingRecording through theDV Input jackRecording fromExternal DevicesFollow these directions to record onto a disc or a tapefrom Exter
66 - EnglishRecordingMaking a TimerRecordingMaking a One TouchRecording (OTR)One-Touch Recording (OTR) allows you to add recording time in preset incr
English - 67Recording•Recording mode (VCR)AUTO : Select when you want to set video quality automatically. The auto quality depends onremaining time of
68 - EnglishRecordingEditing the ScheduledRecord ListFollow these directions to edit the timer record list.1Press the MENU button.2Press the …†button
English - 69RecordingBasic VCR RecordingBefore starting1. Check TV channel and Antenna connections.2. Check the remaining time on the tape.You can rec
Getting StartedEnglish - 7Playing a Disc . . . . . . . . . . . . . . . . . . . . . . . . . . . .46Using the Disc Menu and Title Menu . . . . . . . .
70 - EnglishRecording4Press the (REC) button on the remote control orfront panel.For options while recording is in progress, see“Special Recording Fe
English - 71RecordingYou can copy from the DVD to VCR or VCR to DVD.Check the remaining time on the tape and Disc.To copy from DVD to VCR1With the uni
72 - EnglishRecordingTo copy from VCR to DVD1With the unit in Stop mode, press the MENUbutton in stop mode.2Press the …† buttons to select Copy, then
English - 73EditingEditingThis section introduces basic functions of DVDediting and explains both edit functions for therecording on a disc and edit f
74 - EnglishEditing2Press the …† buttons to select Title List, thenpress the ENTER or √button twice.The Title List screen is displayed.3Press the …†bu
English - 75Editing2Press the …† buttons to select a Title you want todelete, then press the ENTER or √ button.3Press the …† button to select Delete,
76 - EnglishEditingLocking(Protecting) a TitleFollow these instructions to lock a title to protect it fromaccidental deletion.1Press the TITLE LIST bu
English - 77EditingDeleting a TitleFollow these instructions to delete a title from the TitleList.1Press the TITLE LIST button.The Title List screen i
78 - EnglishEditing5Press the ENTER button at the end point. The image and end point time are displayed in theSection deletion ending point window.6Pr
English - 79EditingEditing a ChapterYou can make your own chapters on DVD+RWs andedit them using the Chapter Edit menu.1Press the TITLE LIST button.Th
Getting Started8- EnglishGeneral FeaturesThe DVD-VR335 allows you to record and play high qualitydigital video on DVD-RAM/DVD±RW/DVD±R discs. Youcan r
80 - EnglishEditingDeleting all chaptersFollow steps 1 to 3 in page 79If there is only one chapter, it can’t be hidden. Hidden/Show menu is not avai
English - 81EditingDividing a TitleFollow these instructions to divide a long title intoseveral titles.1Press the TITLE LIST button.The Title List scr
82 - EnglishEditing5Press the ENTER button at the end point.• The image and end point time are displayed inthe End window.• The yellow-colored selecti
English - 83EditingPlaying Titles in the Playlist Follow these instructions to play the playlist titles.1Press the PLAY LIST button with the disc stop
84 - EnglishEditing3Press the …† buttons to select Rename, thenpress the ENTER or √ button.The Rename screen is displayed.4Enter the desired characte
English - 85Editing6Press the ENTER button at the start point of thescene.• The image and starting point time are displayedon the Start window.• Selec
86 - EnglishEditing4Press the …† œ √ buttons to select the scene youwant to move (change the position), then press theENTER button.5Press the …† butto
English - 87Editing7Press the ENTER button at the end point of thescene.• The image and time of the end point are dis-played in the End window.• To ca
88 - EnglishEditingDeleting a Playlist Title from thePlaylist1Press the PLAY LIST button with the disc stopped.The Edit Playlist screen is displayed.O
English - 89Editing2Press the …† buttons to select Disc Manager,then press the ENTER or √ button.3Press the …† buttons to select Disc Name, thenpress
Getting StartedEnglish - 9Icon Term DefinitionThis involves a function available DVDin DVD or DVD-R/DVD-RW(V)/+R discs that have been recorded and fin
90 - EnglishEditingFormatting a DiscUse these instructions to format a disc. Clear disc protection before formatting.1With the unit in Stop mode, pres
English - 91Editing2Press the …† buttons to select Disc Manager,then press the ENTER or √ button.3Press the …† button to select Disc Finalize, thenpre
92 - EnglishEditing3Press the …† button to select Disc Unfinalize,then press the ENTER or √ button.You will be prompted with the message 'Do youw
English - 93Editing• When Protected Title exists: The Delete All TitleList function will not operate. If there is a titlecontaining a still picture, h
94 - EnglishReferenceReferenceTroubleshootingSpecificationsLIMITED WARRANTY TO ORIGINALPURCHASER††Troubleshooting(DVD-VIDEO/DVD-RAM/DVD±RW/DVD±R) ...
English - 95ReferenceIf your product malfunctions, go through the check points below before contacting a Samsung authorized ser-vice center,Problem
96 - EnglishReferenceTroubleshooting (DVD)Problem Explanation/SolutionYou cannot use the operation
English - 97ReferenceTroubleshooting (VCR)Before contacting a Samsung authorized service center, perform the following simple checks.Problem
98 - EnglishReferenceProblems and Solutions(Display error Message)Explanation / Solution• You can’t record the video since it is protected by copyrigh
English - 99ReferenceProblems and Solutions(Display error Message)Explanation / Solution• You can’t use the disc because it contains errors from previ
More documents for DVD players Samsung DVD-VR335


Related products and manuals for DVD players Samsung DVD-VR335
 (17 pages)
(18 pages)
(132 pages)
(37 pages)
(73 pages)
(50 pages)
(17 pages)
(18 pages)
(132 pages)
(37 pages)
(73 pages)
(50 pages)
 (168 pages)
(68 pages)
(20 pages)
(18 pages)
(168 pages)
(68 pages)
(20 pages)
(18 pages)
 (38 pages)
(22 pages)
(38 pages)
(22 pages)
 (66 pages)
© 2020, manymanuals.com. All rights reserved. | 1.380 s |
 Manymanuals.com
 Manymanuals.de
 Manymanuals.fr
 Manymanuals.it
 Manymanuals.pl
 Manymanuals.cz
 Manymanuals.es
 Manymanuals-pt.com
Comments to this Manuals